Connect ChatGPT
This walks you through connecting ChatGPT to Assemblified as a custom connector, so you can ask ChatGPT about your bills of materials, sub-assemblies, and raw materials. This walkthrough shows the default read-only flow — the access level is chosen when you generate the connection code (see Connect claude.ai or ChatGPT).
Before you start
Section titled “Before you start”- An active Assemblified subscription (LLM / API Access is in open beta).
- A ChatGPT account that lets you add a custom connector (the Apps / connectors area with developer mode).
Step 1 — Generate your connection code in Assemblified
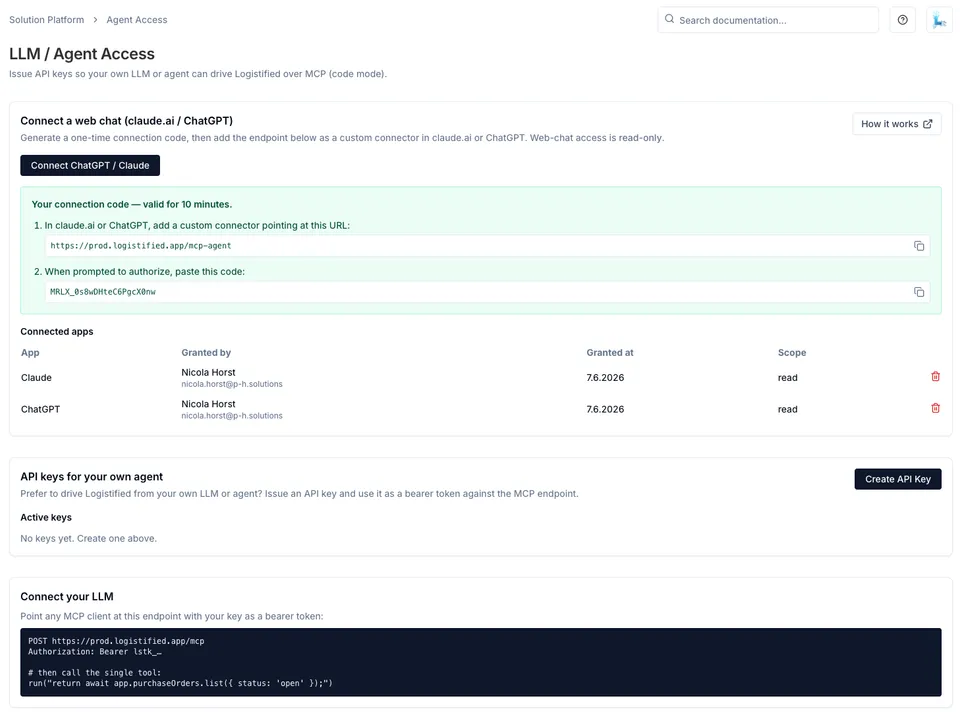
Section titled “Step 1 — Generate your connection code in Assemblified”In Assemblified, generate the one-time code you’ll paste back into ChatGPT at the end.
- Open Settings → LLM / API Access.
- In the Connect a web chat (claude.ai / ChatGPT) card, click Connect ChatGPT / Claude.
- Copy the connector URL (it ends in
/mcp-agent) and the one-time connection code. Both are valid for 10 minutes.
Step 2 — Enable developer mode in ChatGPT
Section titled “Step 2 — Enable developer mode in ChatGPT”Custom connectors live behind ChatGPT’s developer mode.
- In ChatGPT, open Settings → Apps.
- Open the Advanced section.
- Turn Developer mode on.

Step 3 — Create the Assemblified app
Section titled “Step 3 — Create the Assemblified app”- Still under Settings → Apps, click Create app.
- Fill in the form:
- Name:
Assemblified - Description (optional):
Bill of materials - Connection: choose Server URL and paste the
/mcp-agentURL from Step 1 —https://assemblified.com/mcp-agent. - Authentication: OAuth.
- Name:
- Tick I understand and want to continue, then click Create.

Step 4 — Sign in with Assemblified
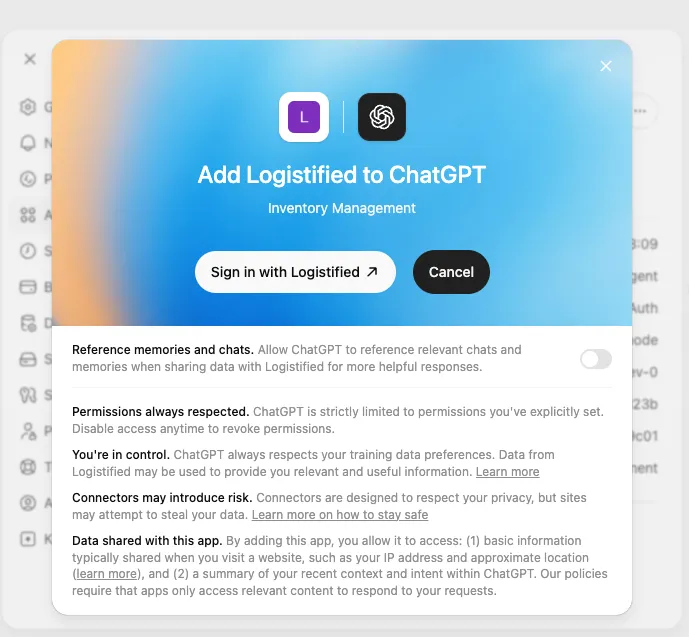
Section titled “Step 4 — Sign in with Assemblified”After creating the app, ChatGPT prompts you to authorize it.
- On the Add Assemblified to ChatGPT screen, click Sign in.
Step 5 — Approve read-only access
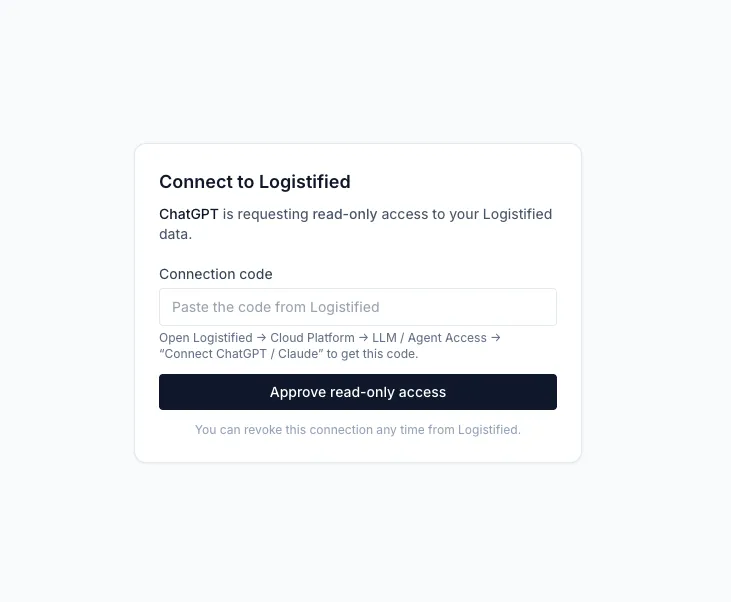
Section titled “Step 5 — Approve read-only access”A browser tab opens on Assemblified’s Connect to Assemblified screen.
- Paste the connection code you copied in Step 1.
- Click Approve read-only access.
Once approved, you’re back in ChatGPT and connected. The connector also shows up in the Connected apps table on the LLM / API Access page in Assemblified.
Try it out
Section titled “Try it out”Ask ChatGPT something in plain language, such as “How many units of my Gift Box Deluxe can I build right now?” It reads the answer live from your store.
See also
Section titled “See also”- Connect claude.ai or ChatGPT — the shared overview of this flow.
- Connect claude.ai — the same flow for claude.ai.
- Managing access & security — revoking connected apps.